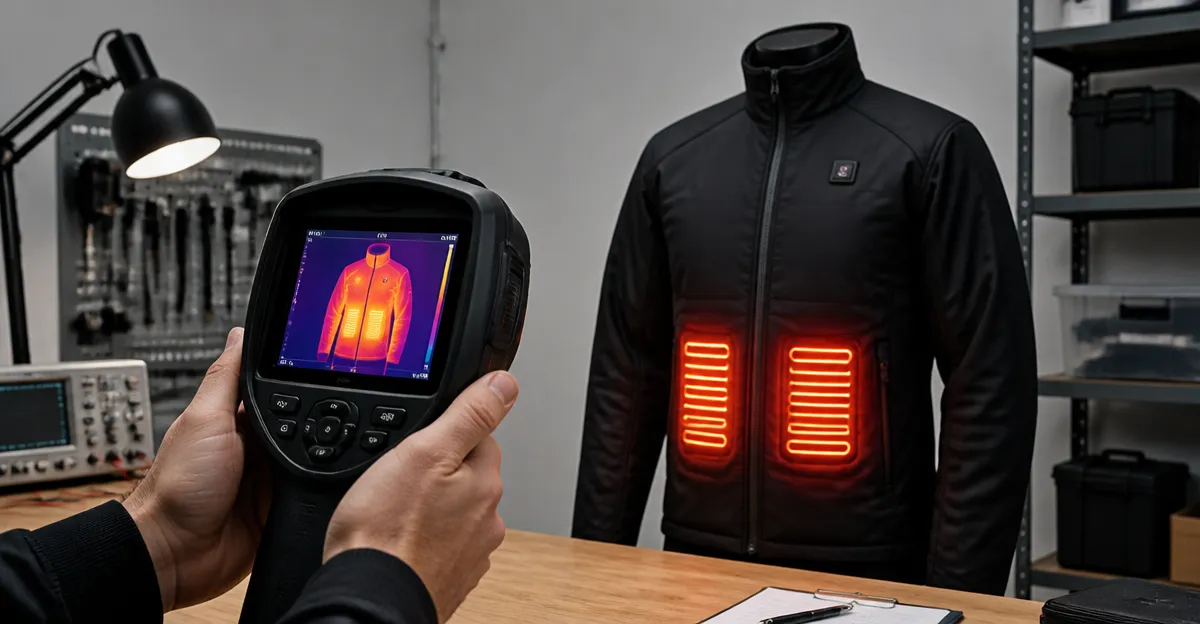
How to Use Thermal Imaging to Test Heated Clothing: Step-by-Step Infrared Camera Guide for Safety and Performance
Introduction
Thermal imaging has become an essential tool for evaluating the performance and safety of heated clothing. This guide will teach the reader how to use an infrared camera to measure temperature distribution, verify heating element functionality, and identify potential hot‑spot failures. By following the systematic procedure, one can ensure that heated jackets, gloves, and leggings meet manufacturer specifications and provide reliable warmth in cold environments. The methods described are applicable to both hobbyists and professional technicians who require accurate, repeatable results.
Understanding thermal patterns allows the user to detect uneven heating, insulation gaps, and electrical faults before they cause discomfort or injury. The guide combines practical steps with recommended tools that are readily available on Amazon. Although the guide can be executed with any infrared camera, the suggested devices provide a balance of affordability, resolution, and ease of use that aligns with the needs of most users.
What You’ll Need
- A reliable infrared camera (see product recommendations below).
- Heated clothing item to be tested (jacket, gloves, or pants).
- A stable, well‑ventilated testing area with ambient temperature between 65°F and 75°F.
- Non‑conductive surface or mannequin to place the garment.
- Power source for the heated garment (battery pack or wall adapter).
- Notebook or digital device for recording observations.
Step‑by‑Step Instructions
Step 1: Prepare the Testing Environment
Begin by selecting a room where temperature fluctuations are minimal. Close doors and windows to prevent drafts, and allow the space to stabilize for at least 15 minutes. Place a non‑conductive mannequin or a wooden frame on the floor to hold the heated garment upright. This setup ensures that the infrared camera captures the garment without interference from metal surfaces, which could reflect infrared radiation and distort readings.
Measure the ambient temperature with a standard thermometer and record the value. Ambient temperature will serve as the baseline for later comparisons, especially when evaluating the garment’s ability to raise surface temperature above the surrounding air.
If the testing area includes reflective surfaces, cover them with dark fabric to minimize stray reflections. Proper environmental control reduces measurement error and improves the reliability of the final report.
Step 2: Set Up the Infrared Camera
Unbox the infrared camera and ensure that the battery is fully charged. For a lightweight, budget‑friendly option, consider the GT14S Thermal Imaging Camera. This device weighs only 240 g, offers a temperature range of –4°F to 1022°F, and provides up to 14 hours of continuous operation, making it suitable for extended testing sessions.
Configure the camera to the "Thermometer Mode" for precise point‑temperature readings, and also enable the full‑screen thermal view to observe overall heat distribution. Adjust emissivity to 0.98, which is appropriate for most textile materials, to improve measurement accuracy. Set the color palette to a high‑contrast option such as "Ironbow" to clearly differentiate hot and cold zones.
Mount the camera on a tripod positioned approximately 3 feet from the garment. This distance provides a clear field of view while maintaining sufficient detail to identify localized hot spots. Verify that the camera’s focus is sharp by capturing a test image of a known temperature source, such as a warm mug.
Step 3: Capture Baseline Thermal Image
Before activating the heating element, capture a baseline thermal image of the garment at ambient temperature. Use the camera’s "Capture" button to store the image in the internal memory. Record the average surface temperature displayed on the camera’s screen; this value typically ranges between 65°F and 75°F for untreated fabrics.
Document the baseline image on a computer or tablet for later side‑by‑side comparison. The baseline serves as a reference point to quantify the temperature increase generated by the heating elements when the garment is powered.
If you prefer a smartphone‑integrated solution, the TOPDON TC002C Duo Thermal Camera connects directly to any USB‑C device, allowing you to view and record thermal data on a phone or tablet. This model offers super‑resolution imaging at 512 × 384 pixels, which can be advantageous for detailed analysis of small garment sections.
Step 4: Activate the Heating Element
Connect the garment’s power source and turn on the heating function according to the manufacturer’s instructions. Allow the heating element to run for a standardized period, such as five minutes, to reach a steady‑state temperature. During this interval, monitor the camera’s live view to ensure that the garment does not exceed safety thresholds (typically 120°F for most heated apparel).
For garments with multiple heating zones, activate each zone individually to isolate temperature contributions. The camera’s real‑time tracking will display temperature changes instantly, enabling you to observe how quickly each zone responds.
Maintain a safe distance from the garment while it is powered to avoid accidental burns. Use gloves or a heat‑resistant tool if direct contact with the heated surface is required for measurement.
Step 5: Record Temperature Distribution
After the heating period, capture a second thermal image using the same camera settings as in Step 3. This image will illustrate the temperature distribution across the garment. Look for uniform warm zones and identify any cold patches that may indicate a malfunctioning heating element or poor insulation.
For high‑resolution analysis, the Thermal Master Handheld Thermal Camera provides a 512 × 384 X³IR sensor, a 3.5‑inch IPS display, and a 40 mK sensitivity, allowing detection of temperature differences as small as 0.04°F. Its built‑in 2 MP visual camera and laser positioning aid in aligning the device precisely over areas of interest.
Export both baseline and heated images to a computer for quantitative analysis. Most infrared cameras support JPEG export, and the Thermal Master device also allows video recording, which can be useful for documenting temperature changes over time.
Step 6: Analyze the Results
Open the exported images in thermal analysis software or a standard image viewer that supports temperature overlays. Compare the baseline and heated images side by side to calculate the temperature delta for each zone. A healthy heated garment typically shows an increase of 30°F to 50°F above ambient temperature, depending on the power setting.
Identify any hotspots that exceed the recommended maximum temperature; these may pose a burn risk and should be investigated further. Conversely, cold spots that do not reach the expected temperature may indicate a broken heating wire or insufficient power delivery.
If the analysis reveals inconsistencies, repeat the test with the garment positioned differently or with a different power setting to confirm the findings. Document all observations, including temperature values, image timestamps, and any visual anomalies.
Step 7: Document Findings and Recommendations
Compile a concise report that includes the following sections: test setup description, ambient conditions, equipment used, baseline temperature, heated temperature, temperature delta, and any identified issues. Attach the thermal images as visual evidence. This report can be shared with manufacturers, safety regulators, or end‑users to demonstrate compliance with performance standards.
When recommending corrective actions, reference specific camera features that aided the diagnosis. For example, the GT14S’s custom high/low temperature alarms can alert users in real time if a zone exceeds safe limits, while the Thermal Master’s 8 × digital zoom helps isolate problem areas without repositioning the garment.
Finally, store the infrared camera in a protective case and keep the firmware up to date to maintain measurement accuracy for future tests.
Tips & Pro Tips
- Calibrate the infrared camera before each testing session using a blackbody reference plate if available.
- Set the emissivity value to 0.95–0.98 for synthetic fabrics; adjust if the garment contains reflective trims.
- Use the GT14S’s 14‑hour battery life to conduct multiple tests without recharging.
- Leverage the TOPDON TC002C Duo’s smartphone app to annotate images directly on the device.
- Employ the Thermal Master’s laser pointer for precise targeting of small heating elements such as those found in gloves.
Troubleshooting
Problem: Camera displays inconsistent temperature readings across the same area.
Solution: Verify that the emissivity setting matches the garment material, and ensure that the camera lens is clean and free of obstructions. Re‑capture the image after adjusting the settings.
Problem: Battery drains rapidly during a test.
Solution: Reduce the refresh rate from 25 Hz to 15 Hz if the camera supports it, and close any unused background applications on the connected smartphone when using the TOPDON Duo.
Problem: Hotspot alerts do not trigger.
Solution: Enable the custom high‑temperature alarm in the GT14S settings and set the threshold slightly below the safety limit to provide a margin of error.
Conclusion
This guide has outlined a comprehensive, step‑by‑step method for using thermal imaging to evaluate heated clothing for safety and performance. By preparing a controlled environment, selecting an appropriate infrared camera, capturing baseline and heated images, and analyzing temperature distribution, one can reliably assess whether a garment meets its design specifications. The recommended tools—GT14S Thermal Imaging Camera, TOPDON TC002C Duo, and Thermal Master Handheld—offer a range of features that enhance accuracy, convenience, and documentation capabilities.
Applying these techniques will help manufacturers improve product quality, enable technicians to diagnose faults quickly, and give consumers confidence that their heated apparel will perform safely in cold conditions.
Products Mentioned in This Guide
Thermal Master Handheld Thermal Camera
Price: $?? (price not provided)
Rating: 4.6/5.0 (238 reviews)
Frequently Asked Questions
What is the best way to set up an infrared camera for testing heated clothing?
Mount the camera on a tripod, set emissivity to 0.95, and allow the garment to reach its normal operating temperature before capturing images.
How can thermal imaging reveal hot‑spot failures in heated jackets?
Hot‑spots appear as isolated high‑temperature areas on the thermal map, indicating a possible short circuit or malfunctioning heating element.
Do I need a specific emissivity setting for different fabrics?
Most textiles use an emissivity of 0.95; adjust only if the material is highly reflective or coated.
Can I use a smartphone‑attached thermal camera for accurate measurements?
Yes, provided the device offers at least 0.1°C accuracy and you calibrate it using a known temperature reference.
How often should I retest heated clothing for safety?
Perform a thermal check before each season of use or after any repair to ensure consistent heating performance.