How to Retrofit a Jacket with Heating Elements: Step‑by‑Step DIY Guide to Install Battery‑Powered Heated Panels Safely
Introduction
One often wonders how to transform an ordinary jacket into a source of personal warmth during cold weather. This guide explains the entire process, from selecting appropriate heating elements to safely integrating a rechargeable battery. By following each step, the reader will acquire the confidence to create a custom‑heated garment that functions reliably and comfortably.
The value of this knowledge lies in its flexibility; a retrofitted jacket can be tailored to specific activities such as hiking, commuting, or outdoor work. Moreover, the guide emphasizes safety, ensuring that the electrical components do not compromise the garment’s integrity or the wearer’s wellbeing.
What You’ll Need
- Flexible heating panels (12 V, low‑profile, waterproof)
- Rechargeable lithium‑ion battery pack with voltage regulator (capacity 5000 mAh recommended)
- Heat‑resistant conductive thread or thin copper wire
- Sewing needle, scissors, and fabric glue
- Multimeter for voltage verification
- Insulating tape or heat‑shrink tubing
- Optional: Venustas Heated Jacket for reference on placement and ergonomics
Step 1: Choose the Right Jacket
The first task is to select a jacket that can accommodate additional layers without sacrificing comfort. One should prefer a garment made of durable, breathable fabric such as polyester‑blend or nylon, because these materials tolerate heat and moisture better than delicate wools. The jacket should have interior pockets or seams that can be opened for the insertion of heating panels. Examining a ready‑made product such as the Venustas Heated Jacket provides a practical example of panel placement and battery integration.
This particular jacket features dual‑control heating zones, a water‑resistant outer shell, and an included battery that operates at 12 V. It is priced at $139.99, carries a rating of 4.4 out of 5 stars from 2,216 reviews, and demonstrates how a professional design distributes heat evenly across the chest and back. By studying its construction, one can replicate similar zones on a personal jacket.
Step 2: Acquire Suitable Heating Panels
Heating panels must be thin, flexible, and rated for low voltage to minimize risk. Panels that are 12 V and consume 5‑10 W per square foot are ideal because they provide warmth without draining the battery rapidly. It is advisable to purchase panels that are waterproof or have a protective coating, as moisture ingress is a common failure point.
When the panels arrive, verify continuity with a multimeter. Each panel should read close to zero resistance when measured across its terminals, indicating an unbroken conductive path. Any panel that shows an open circuit should be replaced before proceeding.
Step 3: Plan the Layout of Heating Zones
One should map out heating zones on a flat surface before attaching any components. Typical zones include the chest, upper back, and sleeves. Using a fabric marker, outline the shape of each panel so that it follows the natural curvature of the body. Ensure that the panels do not overlap, because overlapping can create hot spots that may damage the fabric.
The layout plan should also consider the location of the battery pack. Placing the battery in an interior pocket near the lower back distributes weight evenly and reduces strain on the shoulders. The Venustas Heated Jacket places its battery in a zippered pocket on the left side, illustrating a convenient and discreet position.
Step 4: Attach the Heating Panels to the Jacket
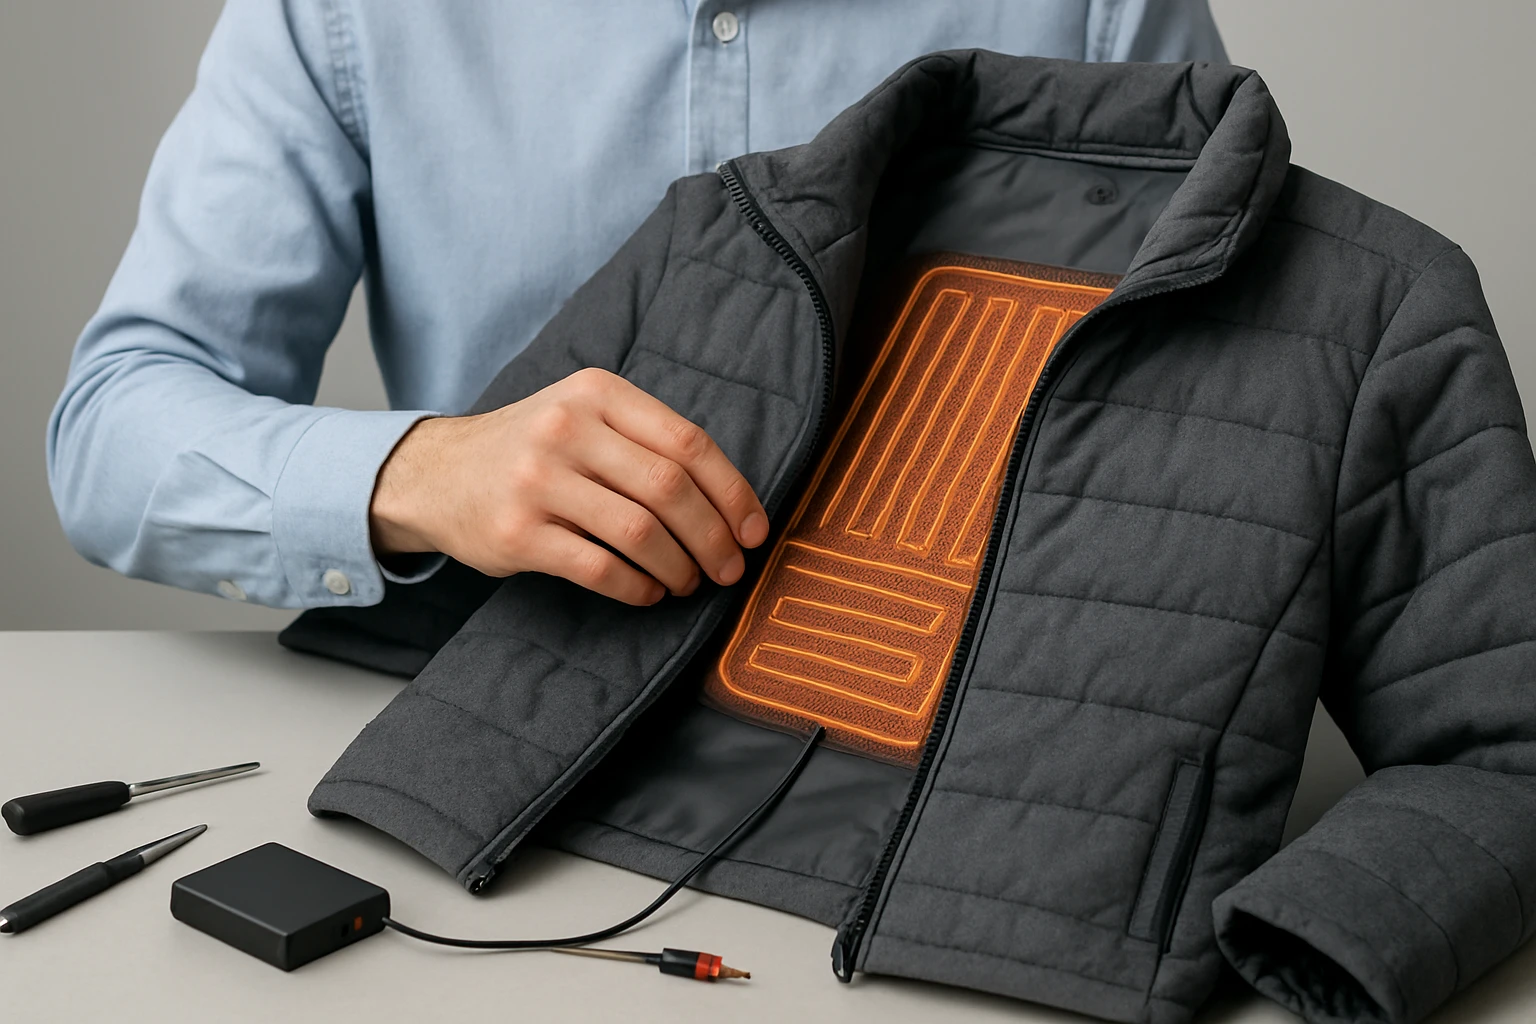
Begin by turning the jacket inside out. Apply a thin layer of fabric glue to the back of each panel, then press the panel onto the pre‑marked area. The glue should be heat‑resistant and flexible after curing, allowing the jacket to retain its movement. For additional security, stitch the edges of the panel using heat‑resistant conductive thread; this also creates a path for the electrical connection.
It is essential to avoid stitching through the heating element itself, as this could create a short circuit. Instead, sew a small hem around the panel and run the conductive thread through the hem. This method maintains the panel’s integrity while providing a reliable electrical route.
Step 5: Wire the Panels to the Battery
Using thin copper wire (approximately 22‑24 AWG), connect each panel to the battery’s output terminals. Route the wires along the interior seams, securing them with insulating tape or heat‑shrink tubing to prevent abrasion. The wires should be grouped together and tucked into a small fabric channel that runs from the chest zone to the back where the battery will reside.
After all connections are made, use the multimeter to confirm that the voltage at each panel matches the battery’s output (12 V). A voltage drop greater than 0.5 V indicates excessive resistance and may require re‑routing or a thicker wire.
Step 6: Install the Battery Pack and Switch
The battery pack should be placed in a zippered interior pocket or a custom‑sewn pouch. Secure the pack with a small piece of Velcro to allow removal for charging. Connect the battery’s positive and negative leads to a waterproof on/off switch, then attach the switch to an accessible location on the jacket’s outer sleeve.
Choosing a switch with a built‑in LED indicator, as found on many heated apparel kits, provides visual confirmation that the system is active. The switch should be rated for at least 2 A to accommodate the combined draw of all heating panels.
Step 7: Test the System
Before wearing the jacket, charge the battery fully and activate the switch. Allow the heating zones to warm for several minutes while monitoring temperature with the hand. The jacket should reach a comfortable warmth (approximately 30‑35 °C) without any hot spots. If any area feels excessively hot, disconnect the corresponding panel and inspect the wiring for short circuits.
It is also prudent to test the jacket under movement. Perform a series of arm raises and torso twists to ensure that the wires and panels remain secure and do not shift or chafe.
Tips & Pro Tips
- Use a battery with built‑in protection circuitry to prevent over‑charging and overheating.
- Seal all wire connections with silicone sealant for added moisture resistance.
- Consider adding a thermal fuse between the battery and panels; this component cuts power if temperature exceeds a safe threshold.
- When sewing, employ a double‑stitch on the hem to reinforce the attachment point.
- Label each wire with heat‑resistant tape to simplify future troubleshooting.
Troubleshooting
Problem: One or more zones do not heat.
Solution: Verify continuity of the wire leading to the affected panel with a multimeter. If the wire is broken, re‑solder or replace the segment. Also check that the panel’s contacts are not covered by excess glue.
Problem: The jacket becomes uncomfortably hot in a specific area.
Solution: Reduce the voltage to that zone using a small resistor or adjust the battery’s output with a voltage regulator. Ensure that the heating panel is not overlapped by another panel.
Conclusion
One now possesses a comprehensive understanding of how to retrofit a jacket with battery‑powered heating elements safely and effectively. By selecting appropriate materials, planning the layout, and following precise wiring procedures, a functional heated garment can be created that rivals commercial options. The skills acquired through this project also empower the reader to customize heating zones for specific activities, thereby extending the utility of any existing outerwear.
As a final encouragement, one should experiment with different panel configurations and battery capacities to achieve the desired balance of warmth, weight, and battery life. The result will be a personalized solution that delivers comfort during the coldest days.
Products Mentioned in This Guide
Frequently Asked Questions
What type of heating panels are best for retrofitting a jacket?
Use low‑profile, 12 V waterproof flexible heating panels designed for clothing.
How should the heating panels be connected to the battery pack safely?
Solder heat‑resistant conductive thread or thin copper wire to the panel leads, then attach them to a voltage‑regulated 12 V lithium‑ion battery with proper insulation.
What battery capacity is recommended for a DIY heated jacket?
A rechargeable 12 V lithium‑ion pack of about 5000 mAh provides several hours of heat without excessive weight.
Is regular sewing thread suitable for wiring the heating elements?
No; use heat‑resistant conductive thread or thin copper wire to avoid melting and ensure reliable conductivity.
How can I test the jacket before wearing it?
Use a multimeter to verify voltage at the panels and briefly power the system for a minute to confirm even heating.