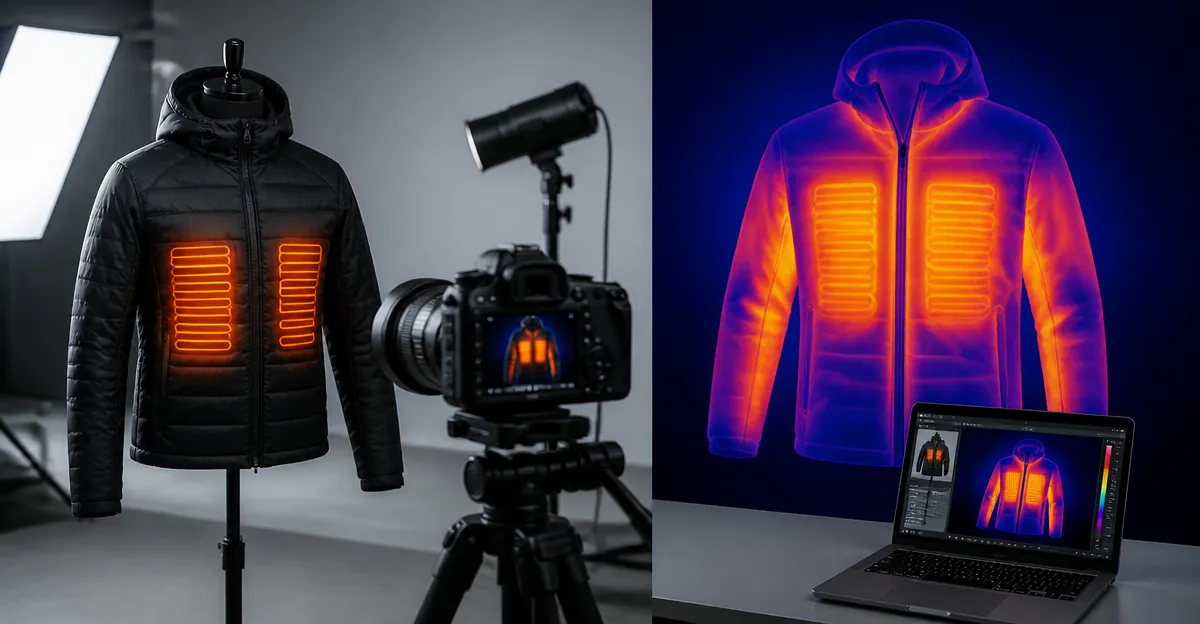
How to Photograph Heated Clothing with Thermal Imaging: Essential Product Photography Tips
Introduction
Thermal imaging has become a powerful technique for showcasing heated garments, allowing photographers to reveal temperature distribution that ordinary cameras cannot capture. In this guide, readers will learn how to select the right thermal camera, prepare a controlled environment, capture accurate heat maps, and enhance the images for marketing or catalog use. Mastering these steps will enable brands to demonstrate performance, build consumer trust, and differentiate their products in a competitive market.
While traditional photography emphasizes color and texture, thermal photography emphasizes temperature gradients, emissivity, and contrast. Understanding the physics behind infrared radiation and the capabilities of modern handheld devices will empower photographers to produce images that are both scientifically accurate and visually compelling.
The guide is designed for intermediate photographers who already understand basic composition but need specialized knowledge for thermal work. All recommended tools are available on Amazon, and each recommendation includes pricing, ratings, and a brief justification for its inclusion.
What You’ll Need
- Handheld thermal imaging camera (see product recommendations below)
- Tripod or stable mounting platform for consistent framing
- Non‑reflective backdrop or matte surface
- Heat source or garment’s built‑in heating element
- Calibration target with known temperature (e.g., a blackbody reference plate)
- Computer with image‑editing software capable of handling 16‑bit thermal data
- Optional: External lighting for visible‑light reference shots
Step 1: Choose the Appropriate Thermal Camera
Selecting a camera that balances resolution, refresh rate, and battery life is critical for capturing clear heat patterns on clothing. For most product‑photography scenarios, a resolution of at least 240 × 240 pixels with a 25 Hz refresh rate provides sufficient detail without excessive data size.
The TOPDON TC004 Mini Thermal Camera offers 240 × 240 TISR resolution, a 15‑hour battery, and smart temperature alerts. Its pocket‑friendly design allows quick repositioning around garments, while the built‑in 512 MB storage can hold up to 8,000 photos, ensuring that no shot is lost during a long session. Priced at $159.00 with a 4.4‑star rating from 979 reviews, it delivers professional performance at a modest cost.
If higher resolution and on‑device storage are required, the TOPDON TC004 Thermal Camera provides a 3.5‑inch display, 512 × 384 enhanced resolution, and 64 GB of internal memory. The larger screen simplifies framing, and the integrated Wi‑Fi enables instant transfer to a computer for rapid post‑processing. At $299.00 and a 4.6‑star rating from 855 reviews, it is an excellent mid‑range option for studios that need extensive documentation.
For photographers who prefer a device with a visible‑light overlay, the TOPDON TC001 Max combines a thermal sensor with a regular camera, delivering 512 × 384 thermal resolution and a dual‑lens system that aligns heat data with visual context. This feature is valuable when showcasing how heating elements integrate with fabric design. The TC001 Max costs $249.99, carries a 4.4‑star rating, and requires only a USB‑C connection to a smartphone or tablet.
For users who already own a compatible smartphone, the Thermal Master P1 attaches via USB‑C and leverages the phone’s screen for live view. Although its resolution is lower (320 × 240), it is extremely portable and costs $129.00, making it a budget‑friendly entry point for small‑scale shoots.
Finally, the Thermal Master Thor002 offers a 3.5‑inch IPS display, 512 × 384 resolution, and a powerful 5000 mAh battery that lasts over 10 hours. Its 8 GB RAM and 32 GB storage support video recording, which is useful for creating dynamic marketing clips. Priced at $399.00 with a 4.5‑star rating, it is ideal for studios that demand the highest image fidelity.
Step 2: Prepare the Shooting Environment
A controlled environment minimizes background temperature fluctuations that could interfere with the thermal signature of the garment. Begin by selecting a room with stable ambient temperature, preferably between 68 °F and 72 °F (20 °C‑22 °C). Close doors and windows, and turn off HVAC units that might introduce drafts.
Place a matte, non‑reflective backdrop behind the clothing to prevent unwanted reflections of infrared radiation. Black or dark gray fabrics work well because they have low emissivity, allowing the garment’s heat to stand out. Position a calibration target at the same distance as the garment; this provides a reference temperature that can be used to adjust the camera’s emissivity settings later.
Turn on the garment’s heating element and allow it to reach its operating temperature, typically indicated by the manufacturer’s specifications. For heated jackets, a warm‑up period of 5‑10 minutes is sufficient to achieve a steady‑state temperature distribution.
When using the TOPDON TC004 Mini, enable the high‑temperature alert to receive a visual cue when the garment exceeds the preset limit. This feature prevents over‑heating and ensures consistent exposure across multiple shots.
Step 3: Configure Camera Settings for Accurate Capture
Set the camera’s emissivity to match the fabric’s material. Most textiles have an emissivity between 0.95 and 0.98; the TOPDON models allow manual adjustment in the settings menu. Accurate emissivity ensures that the temperature readings displayed on the screen correspond to real‑world values.
Select a color palette that highlights temperature differences. The “Rainbow” palette offers a wide spectrum, making subtle gradients on heated panels more visible. For marketing images, the “White Hot” palette can be used to create a clean, high‑contrast look that emphasizes hot zones.
If the camera supports laser pointing, such as the TOPDON TC004, activate the red laser to precisely align the thermal spot with the garment’s heating element. This reduces the need for trial‑and‑error framing and speeds up the workflow.
Set the refresh rate to 25 Hz to capture smooth motion if the model includes moving parts (e.g., a heated sleeve that cycles). For static shots, a lower refresh rate can conserve battery, but the 15‑hour runtime of the TC004 Mini makes this unnecessary for most sessions.
Step 4: Capture the Thermal Images
Mount the camera on a tripod at a distance of 1‑2 feet from the garment to fill the frame while maintaining focus on the heat source. Use the camera’s on‑screen histogram (available on the TOPDON TC004) to verify that the temperature range is fully captured without clipping.
Press the shutter button to capture a still image, then review the temperature overlay. If the hot zones appear washed out, adjust the temperature scale in the camera’s menu to expand the range. The TC004’s auto‑shutdown feature can be set to 10 minutes, preventing accidental battery drain during long sessions.
For video documentation, the Thermal Master Thor002 records in high‑definition .irv format, which can be later extracted into still frames for detailed analysis. Record a short clip of the garment warming up to illustrate performance over time.
After each capture, use the built‑in 512 MB storage of the TC004 Mini or the 64 GB internal memory of the TC004 to store images directly on the device. This eliminates the need for immediate data transfer and reduces the risk of losing files if the camera is accidentally powered off.
Step 5: Post‑Process and Enhance the Images
Transfer the thermal files to a computer using the Wi‑Fi function of the TOPDON TC004 or the USB‑C connection of the Thermal Master models. Import the images into editing software that supports 16‑bit grayscale (e.g., Adobe Photoshop, GIMP, or the free TOPDON TDView application).
Apply a custom color map that matches the brand’s visual identity. For example, a gradient from deep blue (cold) to bright orange (hot) can convey warmth while preserving scientific accuracy. Adjust the contrast and brightness minimally to avoid misrepresenting temperature data.
Overlay a visible‑light photograph of the garment taken with a conventional DSLR to provide context. The dual‑lens capability of the TOPDON TC001 Max simplifies this process, as the thermal and visual images are already aligned.
Export the final image in a high‑resolution PNG or TIFF format for print, or a compressed JPEG for web use. Include a temperature scale bar in the corner of the image to communicate the exact temperature range displayed.
Tips & Pro Tips
- Always clean the camera lens with a lint‑free cloth; fingerprints can introduce false hot spots.
- When photographing reflective fabrics, lower the emissivity setting slightly (e.g., 0.92) to compensate for reflected infrared radiation.
- Use the built‑in high/low temperature alarms to automatically capture images when the garment reaches peak performance.
- For batch shooting, create a preset profile on the camera that stores resolution, palette, and emissivity settings.
- Consider using a portable blackout tent to isolate the shooting area from ambient heat sources.
Troubleshooting
| Problem | Possible Cause | Solution |
|---|---|---|
| Image appears uniformly gray | Incorrect emissivity or temperature range too narrow | Adjust emissivity to 0.95‑0.98 and expand temperature scale in camera menu. |
| Temperature readings fluctuate rapidly | Camera not stabilized on a tripod | Mount camera on a stable tripod and allow at least 30 seconds for sensor stabilization. |
| App crashes when importing files | Outdated firmware or insufficient RAM | Update camera firmware via the manufacturer’s website and close other applications during import. |
| Misalignment between thermal and visual overlay | Dual‑lens calibration drift | Re‑calibrate using the built‑in alignment tool or reinstall the app. |
Conclusion
Photographing heated clothing with thermal imaging combines scientific precision with creative storytelling. By selecting the appropriate camera, preparing a stable environment, configuring accurate settings, and applying thoughtful post‑processing, photographers can produce images that highlight performance, build consumer confidence, and differentiate products in a crowded marketplace. The tools recommended in this guide—ranging from the compact TOPDON TC004 Mini to the high‑resolution Thermal Master Thor002—provide flexibility for studios of any size. Implement the tips and troubleshooting steps outlined above, and the resulting thermal photographs will showcase heated apparel with clarity and impact.
Products Mentioned in This Guide
Frequently Asked Questions
What type of thermal camera is best for photographing heated clothing?
A handheld infrared camera with adjustable emissivity settings and a resolution of at least 320×240 pixels provides clear temperature gradients for apparel.
How should I prepare the shooting environment for thermal imaging of heated garments?
Use a low‑draft, temperature‑controlled room with a uniform background and eliminate reflective surfaces to avoid false heat readings.
Why is emissivity adjustment important when capturing thermal images of fabrics?
Different fabrics emit infrared radiation differently; setting the correct emissivity (typically 0.95‑0.98 for textiles) ensures accurate temperature representation.
Can I edit thermal photos in standard photo‑editing software?
Yes, you can export the thermal image as a JPEG or TIFF and adjust contrast, color palettes, and overlay temperature data in tools like Photoshop or Lightroom.
How do thermal images improve product marketing for heated clothing?
They visually demonstrate heat distribution and performance, building consumer trust and differentiating the product from competitors.