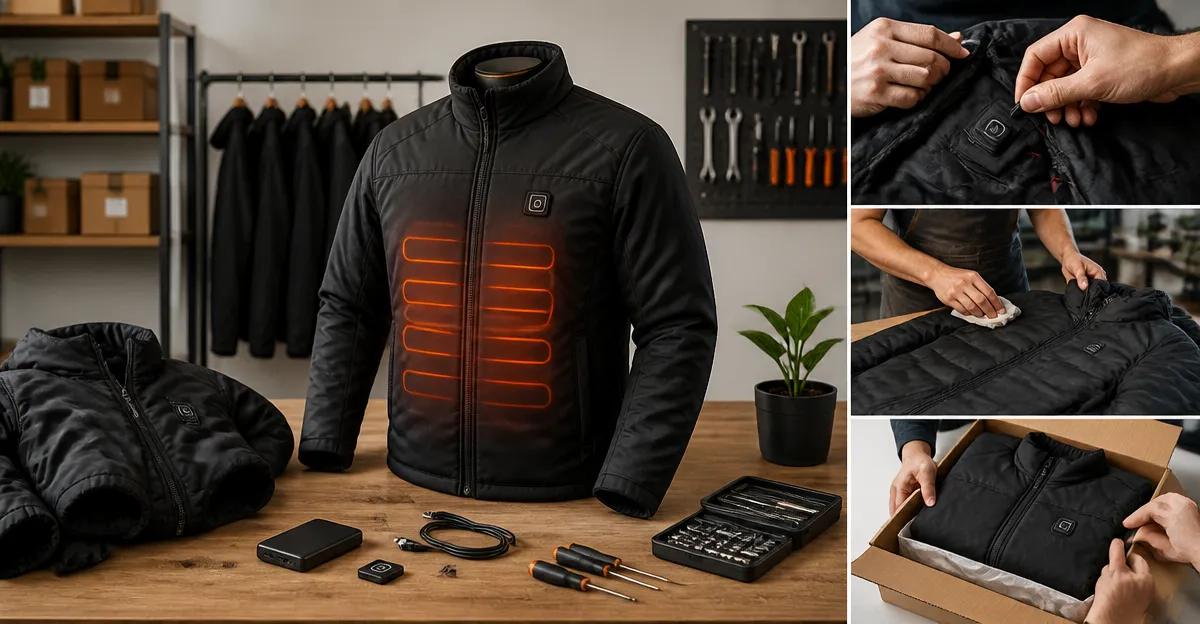
How to Refurbish and Resell Heated Jackets: Step-by-Step Repair, Safety Checks, and Profitable Resale Tips
This guide will teach the reader how to evaluate, repair, and prepare heated jackets for resale. By following each stage, one can restore functionality, ensure safety, and maximize profit margins. The process combines basic textile repair with electrical troubleshooting, making it suitable for hobbyists and small‑scale entrepreneurs. Understanding these steps also reduces waste and extends the life of valuable winter gear.
What You Will Need (Optional)
- Screwdriver set (precision flat‑head and Phillips)
- Multimeter with temperature probe
- Sewing kit (heavy‑weight thread, needle, fabric glue)
- Replacement battery packs (see product recommendations below)
- Heat‑shrink tubing and electrical tape
- Protective gloves and eye protection
- Cleaning supplies (mild detergent, soft brush)
Step 1: Assess the Jacket Condition
The first step is a thorough visual and tactile inspection. Examine seams, zippers, and heating zones for signs of wear, corrosion, or fabric tearing. Document any missing components, such as battery packs or control buttons, because these items affect resale value. Take clear photographs from multiple angles; high‑quality images increase buyer confidence and can justify a higher price.
If the jacket appears structurally sound but the heating function fails, the issue is likely electrical. At this stage, consider using a known‑good jacket as a reference. The OAOA Heated Jacket (price $59.99, rating 4.4/5 from 660 reviews) provides a reliable benchmark for heating zone placement and battery performance. Comparing voltage readings against this reference helps isolate faults quickly.
Step 2: Disassemble Safely
Before opening the jacket, disconnect the battery pack and remove any detachable accessories such as hoods or pockets. Use a precision screwdriver to unscrew the internal battery compartment, taking care not to strip the screws. Keep all fasteners organized in a small container to avoid loss during reassembly.
During disassembly, note the routing of heating wires and any heat‑shrink tubing. Photograph the wiring layout; this visual aid simplifies reconnection later. If the jacket uses a proprietary 12V connector, the DEWBU Heated Jacket (price $149.99, rating 4.4/5 from 7,997 reviews) includes a robust 12V battery system that can serve as a temporary power source while you test the original circuitry.
Step 3: Test Electrical Components
With the jacket open, use a multimeter to verify continuity across each heating zone. Set the meter to the resistance (Ω) mode and probe the carbon‑fiber elements; a reading between 2–5 Ω typically indicates an intact circuit. Measure the battery voltage; a healthy 10000 mAh pack should read around 7.4 V, while the DEWBU 12V pack should read close to 12 V.
If a zone fails continuity, locate the break and prepare to replace the heating element. For voltage monitoring, the Brimekey Heated Jacket (price $89.99, rating 4.4/5 from 96 reviews) includes a digital battery display that can be repurposed as a voltage indicator during testing. Its 20000 mAh battery provides ample power for multiple test cycles, reducing downtime.
Step 4: Replace Battery or Heating Elements
When the original battery is degraded, replace it with a compatible high‑capacity pack. The OAOA jacket ships with a 10000 mAh battery that also functions as a power bank for phones; this dual purpose adds resale appeal. Alternatively, the Brimekey’s 20000 mAh fast‑charge battery offers up to 10 hours of heat at 149 °F and includes a USB‑C fast‑charging port, making it an attractive upgrade for tech‑savvy buyers.
For heating element replacement, source carbon‑fiber strips of the same gauge. Secure the new strips with heat‑shrink tubing and electrical tape to prevent short circuits. The Unisex Heated Jacket (price $52.99, rating 4.2/5 from 60 reviews) utilizes six independent zones, demonstrating a simple wiring layout that can be mirrored when installing new elements.
Step 5: Repair Seams and Fabric
After electrical work, address any fabric damage. Use heavy‑weight polyester thread to stitch torn seams, reinforcing high‑stress areas such as underarm openings and the hood attachment. Apply fabric glue to small abrasions to prevent further fraying before sewing.
The Venustas jacket showcases a waterproof exterior with a silver mylar lining that reflects 97 % of body heat. When repairing a jacket, consider adding a similar reflective liner to improve insulation. The Venustas Heated Jacket (price $149.99, rating 4.3/5 from 3,081 reviews) includes this technology, making it a useful reference for enhancing thermal performance.
Step 6: Reassemble and Seal
Reattach the battery compartment, ensuring all connectors are firmly seated and insulated. Replace any protective covers and verify that the control button operates smoothly. Before final closure, perform a quick heat test by powering the jacket on low for one minute; confirm that each zone emits warmth without unusual smells.
Seal seams with a waterproof seam tape if the jacket will be marketed for outdoor activities. This extra step differentiates a refurbished product from a basic repair, allowing you to command a premium price.
Step 7: Perform Safety Checks
Safety is paramount when reselling electrically heated apparel. Conduct a full voltage drop test across each zone while the jacket is powered at its highest setting. Verify that the temperature does not exceed the manufacturer’s maximum (typically 147 °F for the OAOA model). Record the results in a brief inspection report to include in the product listing.
Finally, wash the jacket according to the care instructions (usually machine‑washable after battery removal). Ensure the battery is fully dry before reinstalling it, as moisture can cause short circuits. A clean, fully functional jacket will receive higher buyer ratings and fewer returns.
Step 8: Prepare for Resale
Capture high‑resolution photos of the jacket from front, back, and close‑up of heating zones and battery compartment. Write a concise description that highlights key features, such as "8 heating zones, 3 temperature settings, 10000 mAh battery that also charges phones." Include the inspection report and any warranty you are offering.
Price the jacket based on its condition, brand reputation, and market demand. For example, a refurbished OAOA Heated Jacket can be listed between $70 and $85, providing a healthy margin over the $59.99 purchase price. Use platforms that allow detailed specifications, such as eBay or specialized outdoor gear forums, to reach the most relevant audience.
Tips & Pro Tips
- Always work in a well‑ventilated area when soldering or using heat‑shrink tubing.
- Keep a spare battery pack on hand; customers value the ability to charge devices while staying warm.
- Label each heating zone internally with a small fabric tag; this simplifies future troubleshooting.
- Consider offering a short‑term guarantee (30‑days) to build buyer trust.
- When photographing, use natural light to accurately depict color and fabric texture.
Troubleshooting
| Problem | Possible Cause | Solution |
|---|---|---|
| No heat on any zone | Dead battery or disconnected wiring | Test battery voltage; reseat connectors; replace battery if voltage <6 V. |
| Only one zone heats | Broken heating element or short circuit | Check continuity; replace faulty carbon‑fiber strip; use heat‑shrink tubing to isolate. |
| Overheating smell | Shorted wires or damaged insulation | Inspect for exposed wire; apply electrical tape; verify proper voltage settings. |
Conclusion
Refurbishing heated jackets combines textile repair with basic electronics, offering a rewarding way to generate profit while reducing waste. By following the eight detailed steps, performing rigorous safety checks, and presenting the product professionally, one can achieve consistent resale success. The recommended tools and replacement parts, such as the OAOA, DEWBU, Brimekey, Unisex, and Venustas jackets, provide reliable benchmarks and upgrade options that enhance the value of each refurbished item. Start with a single jacket, document the process, and scale the operation as confidence grows.
Products Mentioned in This Guide
Frequently Asked Questions
How do I assess the condition of a used heated jacket before refurbishment?
Perform a visual and tactile inspection of seams, zippers, heating zones, and battery connections, noting any wear, corrosion, or fabric damage.
What safety checks are essential after repairing the heating elements?
Use a multimeter to verify voltage and continuity, ensure no short circuits, and test the jacket’s heating function before handling the battery.
Which tools are recommended for replacing a heated jacket’s battery pack?
A precision screwdriver set, replacement battery pack, heat‑shrink tubing, and electrical tape are needed to secure and insulate the new battery.
How can I clean a heated jacket without damaging its electronic components?
Spot‑clean with mild detergent and a soft brush, avoiding the heating wires and battery compartment, then let it air‑dry completely.
What factors should I consider when pricing a refurbished heated jacket for resale?
Base the price on the jacket’s brand, condition, repaired functionality, current market demand, and comparable listings, adding a modest profit margin.