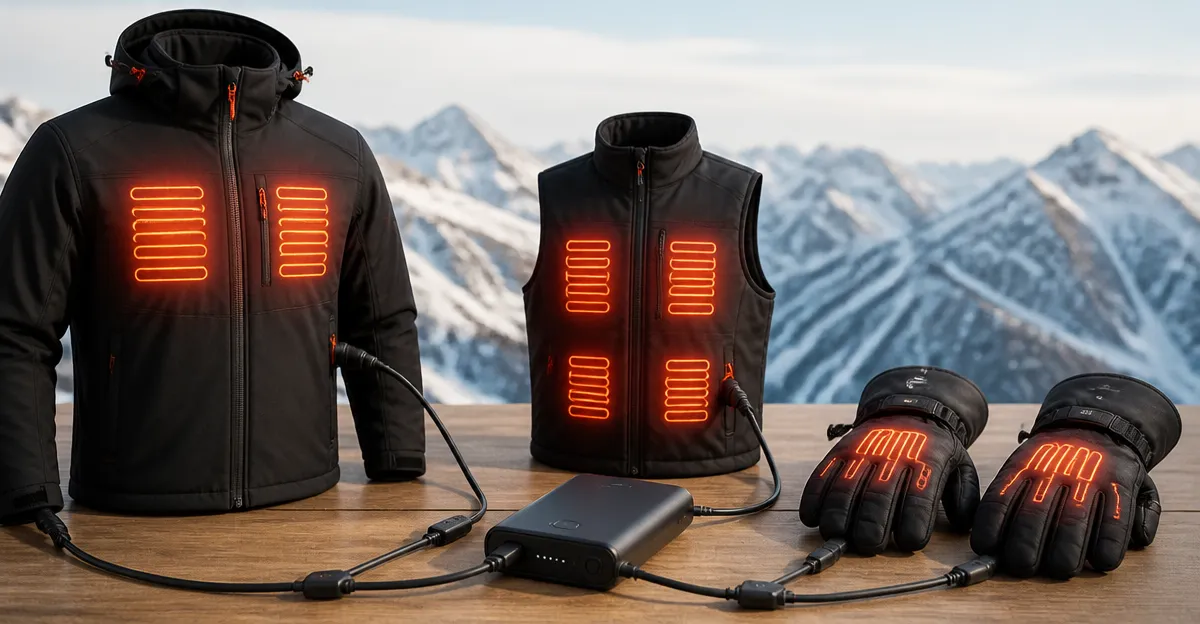
How to Power Multiple Heated Garments from One Battery: Safe Wiring, Battery Sizing & Step‑by‑Step Setup
Introduction
One battery can keep a heated vest, jacket, and even a heated seat warm during long outdoor activities. This guide explains how to assess power requirements, select an appropriate battery, wire multiple garments safely, and monitor performance. The reader will learn to avoid common safety pitfalls while maximizing heat duration. By following the professional steps, one can enjoy reliable warmth without the inconvenience of swapping batteries.
What You'll Need
- High‑capacity heated‑vest battery pack (examples below)
- USB‑C or Type‑C charging cable
- DC adapters and appropriate connector adapters (4.0mm, 3.5mm, 3.8mm)
- Heat‑resistant wiring or pre‑made harnesses
- Multimeter for voltage verification
- Protective case or pouch for transport
Step 1: Determine the Total Power Requirement
Begin by consulting the specifications of each heated garment. Most heated vests operate at 7.4V with a current draw between 0.5A (low) and 1.5A (high). A heated jacket may draw similar current, while a USB‑powered heated seat typically requires 5V at 2A. Add the maximum currents together to calculate the peak load; for example, two 7.4V garments at high setting (1.5A each) plus a 5V seat at 2A results in roughly 5A total when converted to a common voltage.
Next, decide how long the system must run without recharging. Multiply the total current by the desired operating hours to obtain the required amp‑hours (Ah). If the target is 8 hours, the calculation is 5A × 8h = 40Ah, which translates to 40,000mAh at the appropriate voltage. This figure guides the selection of a battery pack that can meet both voltage and capacity needs.
Step 2: Choose the Right Battery Pack
Several battery packs on the market satisfy the calculated requirements. The MOSILA 30000mAh Heated Vest Battery offers a large 30,000mAh capacity, multiple output voltages (5V/9V/12V), and a clear LED display. Priced at $35.99 with a 4.2‑star rating from 252 reviews, it provides ample power for up to 12 hours on medium heat for two 7.4V garments.
If a lighter option is preferred, the Sevdiea Heated Vest Battery supplies 16,000mAh at 7.4V, includes a USB port, a Type‑C port, and a DC port, and features an accurate LED display. At $28.46 and a 4.6‑star rating from 262 reviews, it delivers up to 9 hours of heat on low setting and is pocket‑sized for travel.
For users whose garments rely exclusively on 5V USB input, the OKZU 20000mAh Heated Vest Battery is ideal. It provides up to 14 hours of heat for USB‑powered clothing, weighs only 10 oz, and includes a fast‑recharge USB‑C input. The unit costs $30.99 and holds a 4.5‑star rating from 294 reviews.
When minimal weight is essential, the OKZU 10000mAh Heated Vest Battery delivers 7 hours of heat for a single 5V garment, weighs 5.8 oz, and is priced at $24.99 with a 4.4‑star rating from 2,512 reviews. This model is useful as a secondary backup battery.
Step 3: Gather Adapters and Connectors
Many heated garments use a 4.0 mm DC plug, while others employ 3.5 mm or 3.8 mm connectors. The Buvizas Heated Vest Battery includes both 4.0 mm‑to‑3.5 mm and 4.0 mm‑to‑3.8 mm adapter cables, ensuring compatibility with a wide range of garments. Priced at $28.99 with a 4.5‑star rating from 296 reviews, it also provides a built‑in auto‑start feature that eliminates the need to press a power button after connection.
For USB‑only devices, standard USB‑C to USB‑A cables are sufficient. Ensure the cable rating matches or exceeds the battery’s output (e.g., 5V/2A). Using the supplied cable from the selected battery pack guarantees optimal performance and safety.
When wiring multiple garments in parallel, use heat‑resistant, appropriately gauged wire (18‑20 AWG) and include a small fuse (1 A for 5V lines, 2 A for 7.4V lines) to protect against short circuits. A multimeter should be used to verify voltage at each connection point before powering the garments.
Step 4: Connect the First Garment
Begin by charging the chosen battery pack using its recommended wall charger. The Sevdiea pack suggests a 5V/2.1A charger, while the OKZU 20000 mAh model recommends a USB‑C fast charger for rapid replenishment. Allow the battery to reach at least 80 % before beginning the wiring process.
Attach the appropriate DC adapter to the battery’s DC output port. For a 7.4V vest, use the 4.0 mm plug directly or insert the correct adapter from the Buvizas kit. Verify the voltage with a multimeter; it should read between 7.2 V and 7.8 V under no load.
Plug the garment’s connector into the adapter and activate the vest’s heating element. Most heated vests feature selectable temperature settings; start with the medium setting to gauge power consumption. Observe the battery’s LED display to confirm that the remaining capacity decreases at the expected rate.
Step 5: Wire Additional Garments in Parallel
To power multiple garments from a single battery, connect each garment’s power line in parallel to the same voltage source. This approach maintains the original voltage while the currents of each garment add together. Use a small distribution block or a Y‑splitter that matches the connector type.
For mixed‑voltage systems (e.g., a 7.4V vest and a 5V heated seat), employ a DC‑DC buck converter to step down the voltage for the 5V device. The MOSILA battery’s 5V/9V/12V output can be set to 5V directly, eliminating the need for an external converter. Connect the 5V output to the heated seat’s USB cable, ensuring polarity is correct.
After all connections are made, re‑measure the voltage at each garment’s input. The voltage should remain stable within 5 % of the nominal value. Turn on each garment sequentially, monitoring the battery’s LED display for any sudden drops that may indicate an overload.
Step 6: Monitor Battery Health and Safety
Modern heated‑vest batteries incorporate protection circuits that prevent over‑charging, short circuits, and excessive discharge. The Sevdiea and MOSILA packs both feature intelligent sleep modes that deactivate the display when not in use, conserving power. Nonetheless, it is prudent to check the battery level every hour during extended outings.
If the battery temperature exceeds 45 °C (113 °F), pause usage and allow the pack to cool. High temperatures can degrade Li‑Polymer cells and reduce overall lifespan. Store the battery in a shaded, ventilated compartment when not in use.
When the battery reaches below 20 % capacity, reduce garment temperature settings to low to extend remaining runtime. Recharging should be performed with the manufacturer‑recommended charger to avoid over‑voltage conditions.
Step 7: Pack for Travel and Air Travel Compliance
All recommended battery packs comply with airline regulations for carry‑on luggage because they are under 100 Wh. The Buvizas battery, measuring 2.75 × 4.01 × 0.98 in and weighing 0.56 lb, easily fits in a standard backpack. The MOSILA pack, while larger, remains under the 30 Wh threshold for most airlines.
Place the battery in a protective case to prevent physical impact. Include the original charging cable and any adapter cables to avoid loss. If traveling internationally, verify that the destination’s voltage standards match the battery’s input specifications.
Before boarding, ensure the battery is turned off or in sleep mode to comply with airline safety policies. Upon arrival, recharge the pack if possible to guarantee full capacity for the upcoming activities.
Tips & Pro Tips
- Use a dedicated wall charger with at least 2 A output for faster recharging; the OKZU 20000 mAh model reaches full charge in six hours with a USB‑C fast charger.
- Label each connector with colored tape to avoid confusion when multiple garments share the same battery.
- Keep a small spare fuse in your kit; a blown fuse can be replaced quickly without returning home.
- Consider a secondary low‑capacity battery (such as the OKZU 10000 mAh) as an emergency backup for short trips.
- Regularly inspect connector pins for corrosion; clean with a dry brush if necessary.
Troubleshooting
Problem: Battery drains faster than expected.
Solution: Verify that all garments are set to the intended temperature; reduce to low if possible. Check for unintended parallel connections that may cause a short.
Problem: One garment does not heat while others work.
Solution: Measure voltage at the garment’s connector; a drop below the required voltage indicates a faulty adapter or damaged wire.
Problem: Battery becomes excessively hot.
Solution: Stop usage immediately, allow the pack to cool, and ensure the battery is not placed in direct sunlight or a confined space.
Conclusion
By assessing power requirements, selecting a suitable high‑capacity battery, and wiring garments in parallel with proper adapters, one can reliably power multiple heated garments from a single source. The recommended products—MOSILA 30000 mAh, Sevdiea 16000 mAh, OKZU 20000 mAh, OKZU 10000 mAh, and Buvizas 16000 mAh—provide a range of capacities, voltages, and portability options to suit diverse needs. Following the safety guidelines and troubleshooting steps ensures long‑lasting warmth during outdoor adventures, travel, or daily commutes.
Products Mentioned in This Guide
Frequently Asked Questions
How do I calculate the total power needed to run multiple heated garments?
Add the current draw of each garment at its operating voltage and multiply by the voltage to get total wattage; ensure the battery’s amp‑hour rating exceeds the combined current for the desired runtime.
What battery voltage is required for most heated vests and jackets?
Most heated vests and jackets operate at 7.4 V, though some models use 5 V or 12 V—always verify the spec label on each garment.
Can I use a single USB‑C cable to connect several heated garments together?
Yes, if the garments use USB‑C power input and the battery pack supports the combined current; use a high‑current (≥3 A) USB‑C cable and a splitter rated for the total load.
How should I wire the garments to ensure safety and avoid short circuits?
Use heat‑resistant wiring or a pre‑made harness, tie all positives together and all negatives together, and include a fuse or inline current limiter for each line.
What safety checks should I perform before and during use?
Verify voltage with a multimeter, confirm all connections are secure, and monitor battery temperature; stop use if any component becomes unusually hot.